Gifts, Gifts, & Gifts


Nothing like a last minute Martin Luther King, Jr. activity, but I made it a FREEBIE for you to make up for it. I realize that I may…

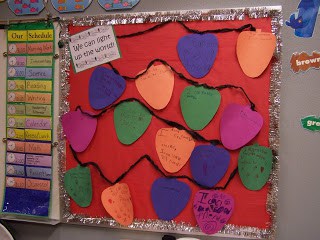
This is an easy bulletin board that I did this year. I cut out Christmas lightbulb shapes from construction paper and had students write something they…

It’s a new year! Even though it’s not a new school year, it can still mean time for a fresh start. The students have had a break, and…

Today’s post is complete randomness, but I feel like that kind of sums up life right now 😉 I LOVE the holidays, but somehow, someway, I…

Our unit on penguins was pushed back a week since we weren’t in school last week. Teaching about penguins always makes that first week back a…

What child doesn’t love to see his or her picture? I took advantage of this and used pictures of the students doing exactly what was expected of…
Adorable! How did you get the photo in the ornament?
I very loosely rolled the picture and then used a pencil (the eraser end) to flatten the picture.
Thank you for your reply! I’m doing it this week for the parents. So, you didn’t glue it in at all? just placed it in with the snow?
I am going to try to do these with my kiddos this year. I was trying to figure out how you got the picture to stick and stay up in the bulb. It says you put flu stick in the back so when you put it did you glue it to the back of the bulb? What helped get the picture in there? Tweezers? Maybe a chop stick? Any help would be greatly appreciated!
I stuck a pencil in the bulb and used the eraser to push the picture against the side of the ornament.
Thank you for your reply! I’m doing it this week for the parents. So, you didn’t glue it in at all? just placed it in with the snow?
I rubbed the back of the picture with a glue stick first 🙂
ty